Dehumidifier Controls: Best Settings for Humidity & Modes

How do I set the controls on a dehumidifier?
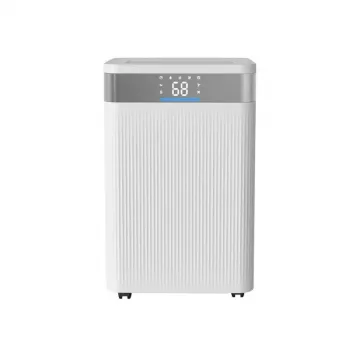
Start by placing the dehumidifier on a level surface with a few inches of clearance around the air intake and exhaust. Plug it into a grounded outlet, then power it on and let it run for a few minutes so the sensor can stabilize before making fine adjustments.
Step-by-step: setting the main controls
1) Choose a target humidity
Use the humidity (RH) buttons or dial to set a goal. A comfortable, widely used range is 45%–55% RH for most living spaces. If you’re dealing with a damp basement, start around 50% and adjust after 24 hours based on how the room feels and whether you see condensation.
2) Pick a fan speed (if available)
Set the fan to High for faster moisture removal or larger rooms, and Low for quieter operation in bedrooms or offices. If your unit has Auto fan, it will change speed to maintain the set humidity more efficiently.
3) Select a mode
Common modes include Continuous (runs regardless of humidity), Comfort/Auto (aims for balanced humidity with less frequent cycling), and Dry/Laundry (more aggressive removal for clothes drying). Use Continuous for flooding cleanup or very damp areas, and Auto/Comfort for daily use.
4) Configure drainage and “bucket full” behavior
If using the bucket, make sure it’s fully seated so the safety switch engages. If using a hose, switch to continuous drain (if your model requires it), attach the hose with a downward slope, and confirm water flows freely to a floor drain or condensate pump.
5) Set the timer and optional features
Use the Timer for scheduled run times, and enable features like Auto Restart (helpful after power outages) or Sleep/Quiet mode for nighttime. If there’s a filter reminder light, reset it after cleaning the filter.
For model-specific button layouts and troubleshooting tips, see the full guide here: https://blessare.com/how-do-i-set-the-controls-on-a-dehumidifier/.
FAQ
What humidity level should I set my dehumidifier to?
Most homes do well at 45%–55% relative humidity. If you notice musty odors or condensation, lower the setpoint a few percent and re-check after a day.









Leave a comment